ngx_http_proxy_module模块:
server {
listen
server_name
location / {
proxy_pass http://192.16.3.7:80/;
proxy_set_header Host $host;
#把客户端请求的主机名转发给proxy_pass,基于主机名的虚拟主机
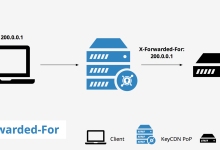
proxy_set_header X-Real-IP
$remote_addr; #把客户端的真实IP转发给proxy_pass
}
}格式:
`/url` --> `/newurl`:
location /url {
               proxy_pass   http://back_server:port/newurl;
              }
如果是模式匹配形式,比如:
location ~ /url {
                 proxy_pass  http://back_server:port/newurl/url;

}则会把访问定向到newurl后面的(把/url补在后面)
如果是rewrite形式,比如:
location /url {
               rewrite xxx
               proxy_pass    http://back_server:port/newurl;
} 则把url重写到另一个url,此时newurl没起作用,nginx会把rewrite后的结果补在http://backk_server:port/进行相应
简单示例:
环境准备
- node1:
118.24.241.89域名:node1.shellscript.cnnginx服务 - node2:
47.107.164.0域名:node2.shellscript.cn:81httpd服务 由于备案问题,node2暂且监听81端口
在Node1节点上配置Nginx反向代理:
[root@server ~]# cd /etc/nginx/conf.d/
[root@server conf.d]#cp default.conf{,.bak} ##复制nginx的默认虚拟主机配置文件编辑default.conf:
location / {
        #root   /usr/share/nginx/html;            ##注释这一行
        proxy_pass http://node2.shellscript.cn:81/;        ##添加这一行反向代理到node2
        index  index.html index.htm;
}重启nginx,此时用任何一个客户端访问node1服务器:
[ec2-user@ip-172-31-40-212 ~]$ curl node1.shellscript.cn
httpd on node2
[ec2-user@ip-172-31-40-212 ~]$此时在node2上查看访问日志,会看到访问IP只有node1
示例二,代理到指定路径
在node2节点的web根目录下创建一个bbs目录和index文件:
[root@node2 ~]# cd /var/www/html
[root@node2 html]# mkdir bbs
[root@node2 html]# echo 'bbs on node2' > bbs/index.html在node1节点的default.conf上加上一段location:
location /bbs/ {
    proxy_pass  http://node2.shellscript.cn:81/bbs/;
}前提要把示例一写的location还原,不然全部请求都会定向到之前的web请求目录
重启nginx
此时客户端访问 http://node1.shellscript.cn/bbs/:
[ec2-user@ip-172-31-40-212 ~]$ curl node1.shellscript.cn/bbs/
bbs on node2
[ec2-user@ip-172-31-40-212 ~]$或者在node1节点这么写:
location /forum/ {
    proxy_pass  http://node2.shellscript.cn:81/bbs/;
}接着重启nginx,客户端访问http://node1.shellscript.cn:81/forum 还是会显示bbs on node2,查看node2的访问日志,会发现并没有访问/forum的请求,并且还是node1像node2发送的/bbs请求,说明具有映射作用
甚至可以写成:
location /forum/ {
    proxy_pass  http://node2.shellscript.cn:81;
}此时前端还是http://node1.shellscript.cn/forum,后端请求则为node2节点的主页面
[ec2-user@ip-172-31-40-212 ~]$ curl node1.shellscript.cn/forum/
http on node2
[ec2-user@ip-172-31-40-212 ~]$
示例三,正则表达式匹配(模式匹配)
node1节点:
location ~* \.(jpg|png|gif)$ {
    proxy_pass http://node2.shellscript.cn:81;
}解析:匹配所有以.jpg、.png、.gif结尾的请求
当使用正则表达式匹配时,会把所有请求原封不动的向http://node2.shellscript.cn:81/后面添加,此时这里只能写服务器地址,后面不能跟任何url路径,否则会语法错误
在node2节点上添加一个test.jpg图片,重启node1的nginx,客户端访问:
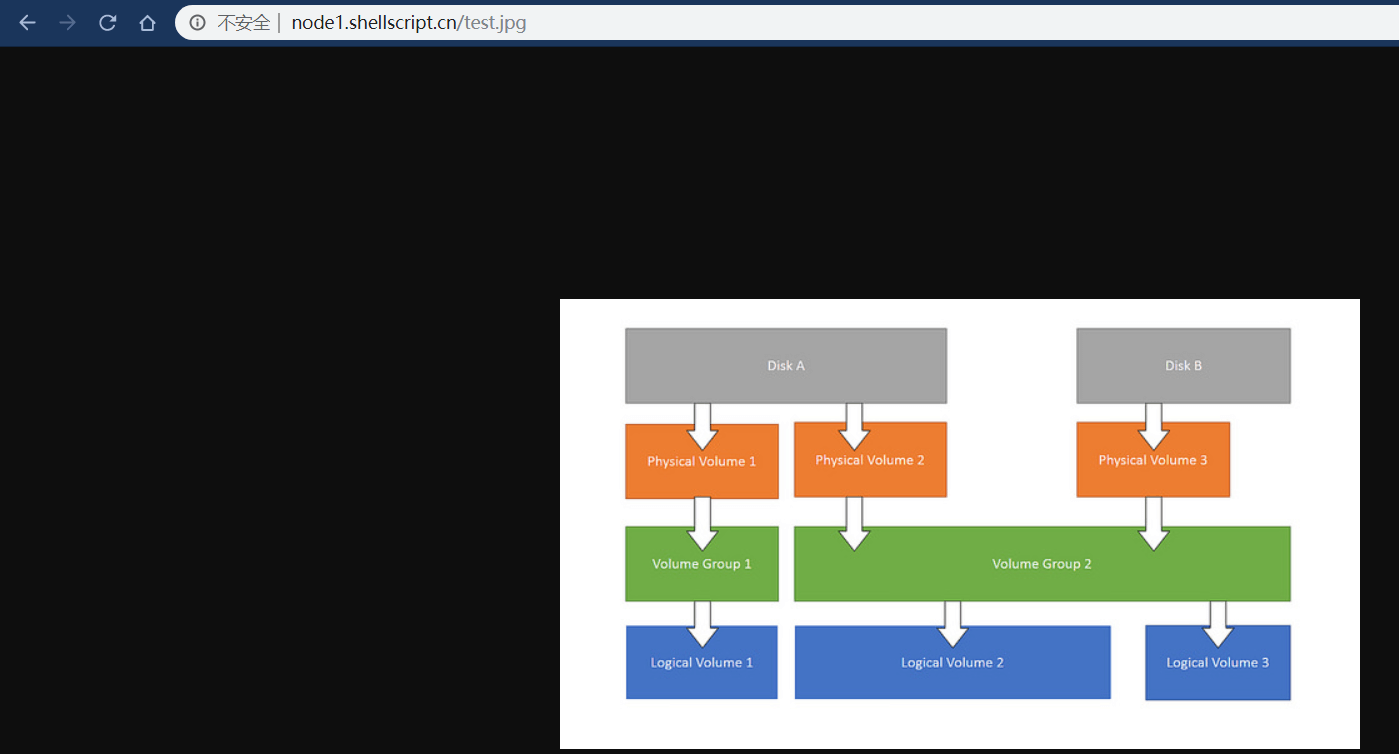
此时访问node1的test.jpg则会把请求定向到node2的test.jpg上
node2的web目录下创建一个放图片的目录:
root@debian:/var/www/html# mkdir images
root@debian:/var/www/html# mv test.jpg images/
root@debian:/var/www/html# ls images/
test.jpg
root@debian:/var/www/html#此时客户端访问http://node1.shellscript.cn/images/test.jpg,因为images/test.jpg满足匹配条件,此时会把/imges/test.jpg原封不动贴在node2后面进行请求,所以还是可以访问到此图片:
nginx_http核心模块的变量含义:http://nginx.org/en/docs/http/ngx_http_core_module.html#variables
$host : 把host守护的值记录在这个变量中
$remote_addr :客户端的地址
示例四,常用代理模块用法(remote_addr和host)
在node1节点上编辑以前的配置,添加proxy_set_header:
location /forum/ {
    proxy_pass http://node2.shellscript.cn:81/bbs/;
    proxy_set_header Host $host;               ##把客户端所请求的host传递到后端
    proxy_set_header X-Real-IP $remote_addr;    ##把客户端真实IP传递到后端
}
    location ~* \.(jpg|png|gif)$ {
    proxy_pass http://node2.shellscript.cn:81;
    proxy_set_header X-Real-IP $remote_addr;
}此时重启Nginx,客户端访问节点一的反向代理路径,会发现node2的日志上依旧只有node1的请求IP。
需要编辑node2的http.conf,修改日志格式:
LogFormat "%v:%p %{X-Real-IP}i %l %u %t \"%r\" %>s %O \"%{Referer}i\" \"%{User-Agent}i\"" vhost_combined
LogFormat "%{X-Real-IP}i %l %u %t \"%r\" %>s %O \"%{Referer}i\" \"%{User-Agent}i\"" combined
LogFormat "%h %l %u %t \"%r\" %>s %O" common
LogFormat "%{Referer}i -> %U" referer
LogFormat "%{User-agent}i" agent把原来的%h替换成%{X-Real-IP}i
重启apache服务,客户端请求node1节点,会发现node2的apache日志显示对方的真实IP,而不是node1的IP,说明node1上的proxy_set_header设置成功
示例五,缓存用法(proxy_cache_path)
因为缓存只能在http模块下定义,所以我们需要修改node1节点的nginx.conf而不是default.conf(里面只有server模块)
在http模块的include之前添加如下内容:
proxy_cache_path /cache/nginx/ levels=1:1 keys_zone=mycache:32m;/cache/nginx为缓存目录,其属主、属组都需要给nginx.conf指定的用户权限。
levels指定缓存目录层级 1:1表示两层目录,第一层和第二层的字符名都为一个字符(如果字符是字母+数字 26+26+9=61个字符的话就有61个目录) levels可省略,有默认值
keys_zone指定内存空间的名字,可自己定义,后面要调用。 mycache:32m表示内存空间名为mycache,用来存储键的大小为32兆
接着在default.conf中编辑server模块下的location:
如果只想缓存location的话则放location,想缓存整个根则直接放server模块下:
location /forum/ {
    proxy_cache mycache;
    proxy_cache_valid  200  1d;
    proxy_cache_valid  301 302 10m;
    proxy_cache_valid  any 1m;
    proxy_cache_use_stale error timeout http_500 http_502 http_503 http_504;
    proxy_pass http://node2.shellscript.cn:81/bbs/;
    proxy_set_header Host $host;
    proxy_set_header X-Real-IP $remote_addr;
}
    location ~* \.(jpg|png|gif)$ {
    proxy_cache mycache;
    proxy_cache_valid  200  1d;
    proxy_cache_valid  301 302 10m;
    proxy_cache_valid  any 1m;
    proxy_cache_use_stale error timeout http_500 http_502 http_503 http_504;
    proxy_pass http://node2.shellscript.cn:81;
    proxy_set_header X-Real-IP $remote_addr;
}
这里缓存两个反向代理的路径
proxy_cache调用之前在http模块定义好的缓存名proxy_cache_valid指定对任意状态码的缓存时间,上述三个proxy_cache_valid结合表示,200状态码缓存1天、301302缓存10分钟、其他的缓存1分钟proxy_cache_use_stale表示在什么情况下使用过期缓存,上述的意思是在后端(node2)返回错误或者超时以及http的一系列50x状态码则使用已过期的缓存,这样至少还能用缓存,而不会返回错误
测试语法并reload nginx:
[root@server conf.d]# service nginx configtest
nginx: the configuration file /etc/nginx/nginx.conf syntax is ok
nginx: configuration file /etc/nginx/nginx.conf test is successful
[root@server conf.d]# service nginx reload
Reloading nginx:                                           [  OK  ]
[root@server conf.d]#接着,客户端请求node1,然后会发现缓存目录已经生成了缓存文件:
[root@server conf.d]# cd /cache/nginx/
[root@server nginx]# tree ./
./
`-- 8
    `-- 8
        `-- f23d3ac2b788cc01baa2bac673df1c88

2 directories, 1 file
[root@server nginx]# ls
8
[root@server nginx]#
可以看到,一级和二级目录都是一个字符组成
此时去编辑node2下的bbs目录下的index.html添加一行内容,客户端刷新请求,会发现页面还是原来的内容
因为proxy_cache_valid定义了200状态码的缓存时间为1天,意味着1天后才会更新缓存
当把/cache/nginx/8这个目录下的缓存删除客户端再刷新请求则会更新缓存
proxy_read_timeout time; 指定后端发送响应的超时时间,不指定此模块则默认是60s
各种模块说明可参考官方文档: http://nginx.org/en/docs/http/ngx_http_proxy_module.html